
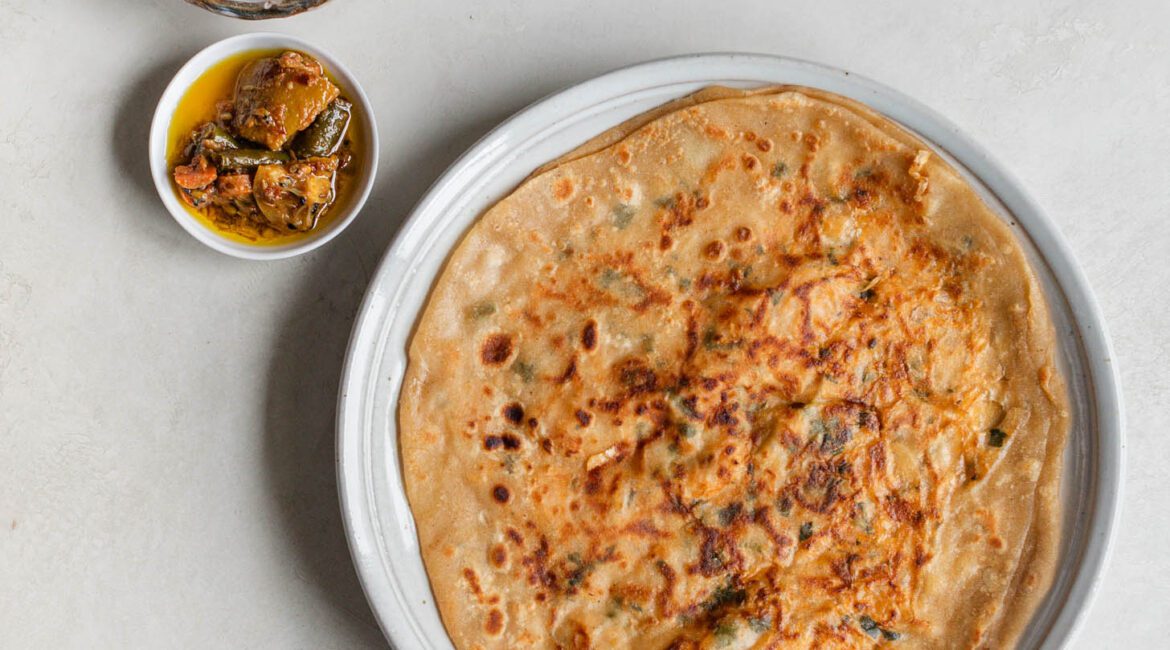
Mooli Paratha (Daikon Radish Paratha) -5 ingredients!

This post may contain affiliate links.
Mooli Parathas are a nostalgic Punjabi breakfast of parathas stuffed with daikon radish. This simple recipe has a 5-ingredient filling (including salt) and includes essential tips to get them right, even if you’ve never made Mooli Parathas before!
Mooli Paratha
I’ve been seeing Mooli, or Daikon Radish everywhere this winter, and it’s only right that I put it in my cart to make some Mooli Paratha – a recipe I first published in 2018 and to this day remains my favorite among all stuffed parathas. I just can’t get enough of the crispy, crunchy bits of mooli and simple, yet sharp flavors. I pair mine with sugar-sweetened plain yogurt or Achaar.
If you’ve never had them before, think of them as scallion pancakes with South Asian vibes. They’re soft yet crispy, spicy, ever-so-slightly sweet, and just so wholesome and flavorful.
If you’re here, I’m assuming you have some experience with paratha-making, but if not, please browse through my paratha recipe for some essential tips on atta-making and cooking the parathas.
Ingredients
Since we’re using such few ingredients, each is critical for balancing the flavor and texture.
- Daikon or White Radish (Mooli) – Daikon radishes are long, white radishes that are popular in Asian and South Asian cuisine. They taste sharp and peppery, but a little milder and sweeter than the tiny red radishes more commonly available here in the U.S. Seasonally, these are a winter vegetable, which is why I’m (re-)sharing this recipe at the cusp of spring. Lately, daikon radish is becoming more and more popular, I’ve seen it at both Whole Foods and HEB all winter long. You can find it at South Asian grocery stores or Asian stores like H-Mart.
- Cilantro leaves and tender stems – Cilantro measures differently (in cups) whole vs when finely chopped, so I’ve given the quantity in grams so you know how much to use – you need plenty to add freshness and herbaceous notes.
- Green chili pepper such as Indian finger Chili or Serrano – Adds flavor and heat, so I would consider using a larger chili. If using Serrano (which is spicier than Indian finger chili), you can always deseed it to reduce heat.
- Prepared atta dough: If using my atta recipe, make a double batch—2× the roti or paratha dough. It’s best to use atta at room temperature for this recipe. You also don’t want loose atta with too much hydration for this recipe. The mooli releases moisture, so a firmer dough is much easier to work with.
How to Make Mooli Paratha – Step-by-Step Photos
Make the filling
- Peel the mooli and run it through the shredder attachment of your food processor. Or just very finely chop using the regular blade.
Shredded Mooli
- Squeeze out the excess moisture really well and place into a large bowl. This is a key tip to crispy, non-soggy Mooli Parathas that won’t fall apart! It helps to use gloves to squeeze out the water from for daikon radish because it can irritate hands just like green chili. You’ll have around 285g of mooli left after squeezing out water.
- Add the remaining filling ingredients and massage into the Mooli.
Make the Peda (dough ball) + Roll out
- Take two golf-ball sized pieces (pedas) of the atta dough, each around 55-60g. Keeping these small helps make thinner parathas, which keeps them extra crispy! Dust the bottom of the piece of atta before forming into a round ball by rolling it forward, then pulling back with your fingers toward the middle. (See video)
- Use a rolling pin to roll them out into small circles, about 5 inches in diameter. Spread about 1 tsp of butter on one side of each of the rolled out atta rounds.
Stuff + Roll Out Paratha
- Place 1/3 cup heaped (~46g) of the mooli mixture on top of one of the rolled out pieces, leaving some room toward the edges. Try to spread the mooli all the way to the edges so the filling distributes evenly throughout. Cover it with the other rolled out piece, butter side down. Press the edges to seal the mixture inside.
- For as long as you can, use your hands to stretch the sealed paratha (think Italian Pizza-making) – Seal the edges while hanging/rotating like a tire so it can stretch while sealing, stretch/pull gently at the edges of the paratha, and/or pass from hand to hand. I like to get it to least 7 inches before I introduce a rolling pin. Lightly dust the semi-rolled out paratha with atta.
- Using a rolling pin, carefully roll out to about 9 inches. Some of the excess water may ooze out and it can get a bit messy, but this is perfectly fine. I personally love the crunchy bits. Sometimes it’ll also trap air bubbles – also fine, though you can firmly tap them out or open an edge and let out the air.
Cook the Mooli Paratha
- Meanwhile, heat a tawa or griddle over medium heat (medium heat + longer cooking = crispier parathas). Once hot, carefully place the paratha on the tawa, lightly pressing the edges to flatten out any thick corners and perfect the round shape. As the bottom of the paratha begins to cook, spread butter all over the top. Flip over and use a flat spatula to press the paratha into the pan, moving it around for even cooking – this also helps make it crispy. Continue spreading butter over the paratha, flipping and pressing as necessary, until it’s thoroughly cooked and golden and crispy on both sides. This will take around 5 minutes per paratha. Remove the paratha from the tawa and serve with sweet yogurt and/or achaar. Repeat with the remaining parathas.
Essential Cooking (Tawa) Techniques
Normally, I cook this on a flat tawa on my gas stovetop. But for pictures, I used an induction stovetop with a cast iron – bad combo: You want a thinner, lightweight tawa, not a thick cast iron pan. But this helped bring some essential cooking tips to mind:
- Move the paratha toward the edges of the pan: If the heat is unevenly distributed, or if the paratha has thicker edges, this will help it cook evenly.
- Fold the paratha in half to cook the edges without having to cook it entirely.
- Keep pressing the paratha with a spatula all around, especially toward the edges or any undercooked parts. This helps cook the inside of the paratha and prevent a soggy filling.
Tried this recipe? If you have a minute, please consider leaving a comment telling me how it was! You can also take a quick picture and upload it directly into the comments. If you’re on Instagram, please tag me so I can see your creations. I truly love hearing from you. Thank you!
Mooli Paratha (Daikon Radish Paratha) – 5 ingredients!
Yield: 6 parathas
Prep Time: 20 minutes
Cook Time: 40 minutes
Total Time: 1 hour
Mooli Parathas are a nostalgic Punjabi breakfast of parathas stuffed with daikon radish. This simple recipe has a 5-ingredient filling (including salt) and includes essential tips to get them right, even if you’ve never made Mooli Parathas before!
- 2 medium (454g/1 lb) daikon radishes (mooli), peeled and ends removed
- 1/3 cup (13 g) finely chopped cilantro leaves and tender stems
- 1 green chili pepper (such as Indian/finger Chili or Serrano for more heat), finely chopped – option to deseed to reduce heat
- 3/4 tsp red chili powder
- 1 1/2 tsp kosher salt, more to taste
- 2 batches prepared atta dough, (use 2x recipe)
- softened butter, ghee, or spreadable butter, as needed
Cook ModePrevent your screen from going dark
-
Use the fine shredder attachment of a food processor to shred the mooli (daikon radishes). Alternatively, chop into chunks and finely chop in the food processor. (It’ll look like finely chopped onions.) You want it extra fine chopped so that it stays contained inside the paratha.
-
Take a handful of the shredded/chopped mooli and cup it between the palms of your hands (use gloves if you want as mooli stings!). Tightly squeeze out the excess water and place the mooli into a large bowl. (Do your best here as you want the mixture to be as dry as possible.) Continue until you’ve removed all the excess moisture from the mooli. This helps the parathas stay dry and retain their shape.
-
Add cilantro, green chili peppers, red chili powder, and salt to the mooli. Use your hands (or gloves) to mix well and massage the seasoning into the mooli.
-
Take two golf-ball sized pieces of the atta dough, each around 55-60g. Dust the bottom of the piece of atta before forming into a round ball by rolling it forward, then pulling back with your fingers toward the middle. (See video) Use a rolling pin to roll them out into small circles, about 5 inches in diameter. Spread 1 tsp of butter on one side of each of the rolled out atta rounds.
-
Place ¼ cup + 1 tbsp (46g) of the mooli mixture on top of one of the rolled out atta rounds, spreading it over but leaving about 1/4 inch of space around the edges. Cover it with the other rolled out piece, butter side down. Press the edges to seal the mixture inside. I seal the edges while hanging/rotating like a tire so it can stretch while sealing.
-
For as long as you can, use your hands to stretch the sealed paratha – grab at the edges of the paratha and stretch/pull gently, or pass from hand to hand – I like to get it to least 7 inches before I introduce a rolling pin.
-
Lightly dust the semi-rolled out paratha with dry atta. Using a rolling pin, roll out to about 9 inches. Some of the excess water may ooze out and it can get a bit messy, but this is perfectly fine. I personally love the crunchy bits. Sometimes it’ll also trap air bubbles – also fine, though you can firmly tap them out or open an edge and let out the air.
-
Meanwhile, heat a tawa or griddle over medium heat (medium heat + longer cooking = crispier parathas). Once hot, carefully place the paratha on the tawa, lightly pressing the edges to flatten out any thick corners and perfect the round shape. As the bottom of the paratha begins to cook, spread butter all over the top. Flip over and use a flat spatula to press the paratha into the pan, moving it around for even cooking – this also helps make it crispy. Continue spreading butter over the paratha, flipping and pressing as necessary, until it’s thoroughly cooked and golden and crispy on both sides. This will take around 5 minutes per paratha. Remove the paratha from the tawa and place on a paper-towel lined plate. Repeat with the remaining parathas.
-
Serve immediately with achaar, plain yogurt, or yogurt sweetened with a bit of sugar (as I like to do).
Calories: 17kcal, Carbohydrates: 4g, Protein: 1g, Fat: 1g, Saturated Fat: 1g, Sodium: 40mg, Potassium: 192mg, Fiber: 2g, Sugar: 2g, Vitamin A: 95IU, Vitamin C: 19mg, Calcium: 23mg, Iron: 1mg
Cuisine: Indian, Pakistani


0 Comments